How to connect a Level Gateway
If you use Level Bridges in units at your property, they connect to the Level network through a Level Gateway. If a Level Gateway is disconnected from power or the internet, this may interrupt Level service for several nearby units.
Follow these steps to connect a Level Gateway:
- Find the Gateway
- Connect the Gateway to power
- Connect the Gateway to Ethernet
- Check the network connection
1. Find the Gateway
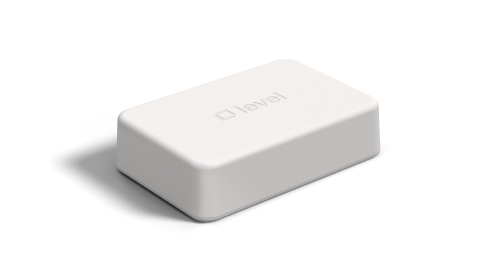
The Gateway is a 5.5" x 3.75" x 1.25" white box with the Level logo embossed on the top.
A Gateway is typically stored in a locked closet with an internet access point. If you're unsure where an affected Gateway is located, contact Support.
2. Connect the Gateway to power
When you connect the Gateway to power, it will take about five minutes to fully power up. The LED lights will not turn on for about two minutes.
Important: Don't plug the Gateway into an outlet that's controlled by a switch.
3. Connect the Gateway to Ethernet
For a reliable experience, the Gateway must stay connected to a stable Ethernet port. To connect it to Ethernet:
- Plug the cable into the router or internet access point.
- Plug the cable into the Gateway.
- Wait about 30 seconds while the Gateway connects.
4. Check the network connection
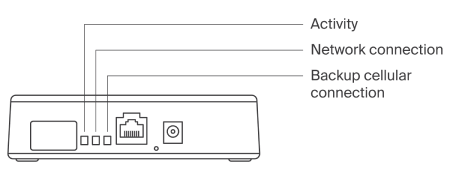
The Gateway should have a reliable Ethernet connection, as well as a backup cellular connection where possible. You can check the Gateway's connection status using the LED lights.
| Green | Red | |
|---|---|---|
| Activity | Normal operation |
The Gateway is working on something Tip: If this LED stays red for longer than a few minutes, contact Support. |
| Network connection | Ethernet is connected |
No Ethernet connection |
| Backup cellular connection | Backup cellular is connected |
No backup cellular connection Tip: Consider moving the Gateway closer to a window. |


