Resident support
How to connect your ButterflyMX intercom to Ambient
If your community has ButterflyMX intercoms and has connected them to Ambient, you can use the Ambient app to answer visitor calls and open the door for your visitor.
Follow these steps to connect your ButterflyMX intercom to the Ambient app:
- Accept your Butterfly MX invitation
- Create a ButterflyMX account
- Connect ButterflyMX to Ambient
- ButterflyMX visitor passes
1. Accept your Butterfly MX invitation
When your property staff adds you to ButterflyMX, you'll receive an email invitation from ButterflyMX.
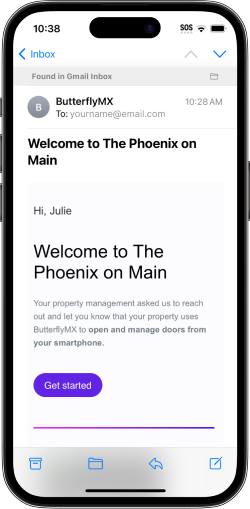
To accept your invitation, tap "Get started".
2. Create a ButterflyMX account
You'll see a screen welcoming you to ButterflyMX and prompting you to add a password to your account.
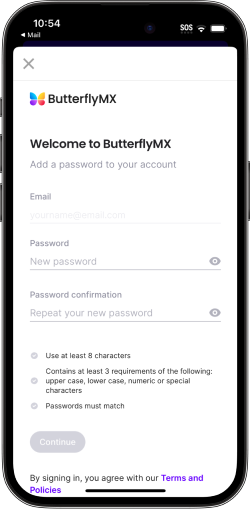
To create your ButterflyMX account:
- Enter your password.
- Enter your password confirmation.
- Tap "Continue".
You'll see a ButterflyMX sign-in screen.
Tip: ButterflyMX will prompt you to sign in to ButterflyMX, set up 2-factor authentication, and install the ButterflyMX app. These steps aren't required if all you want to do is answer visitor calls in the Ambient app.
3. Connect ButterflyMX to Ambient
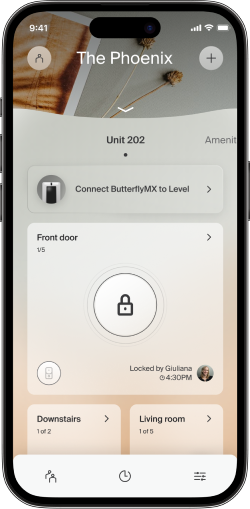
In the Ambient app, you'll see a message prompting you to connect ButterflyMX to Ambient.
To connect:
- Tap "Connect ButterflyMX to Ambient".
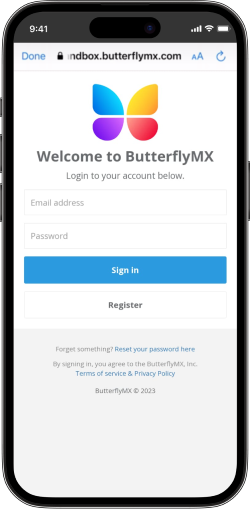
- Enter ButterflyMX username and password.
Important: Your ButterflyMX email must match the email where you received your ButterflyMX invitation. If it doesn't match:- In your invitation, tap "Get started".
- Follow the prompts to create a new ButterflyMX account using the email address where you received your invitation.
- Tap "Sign in".
- You'll see a message prompting you to authorize Ambient to access your ButterflyMX account.
/>
- Tap "Authorize".
You'll see a message confirming ButterflyMX is connected.
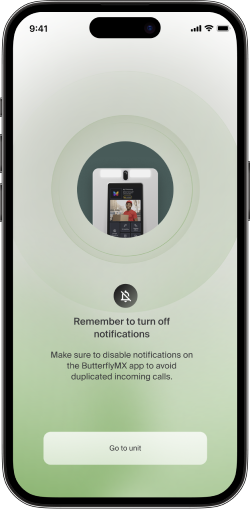
You'll see a message reminding you to turn off notifications in the ButterflyMX app.
Important: The Ambient app only notifies you when your visitor calls you from the intercom. If your visitor texts you from the intercom, you won't see a notification from the Ambient app.

You're ready to start using your intercom with the Ambient app.
4. ButterflyMX visitor passes
Once you have connected ButterflyMX to Ambient, you can:
- View your ButterflyMX visitor passes
- Add a ButterflyMX visitor pass
- Delete a ButterflyMX visitor pass
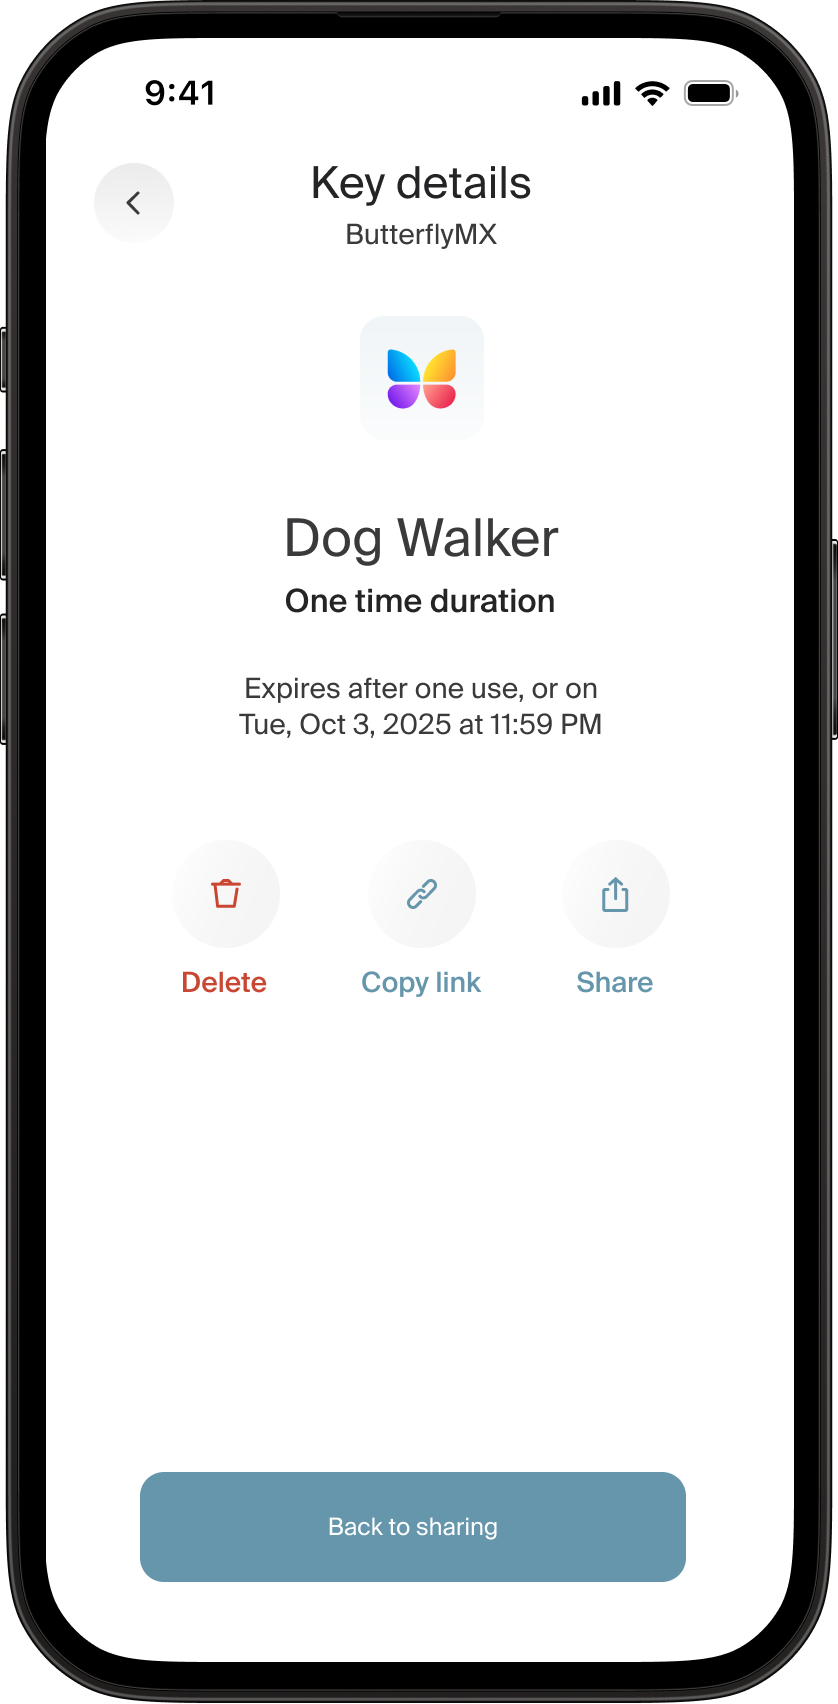
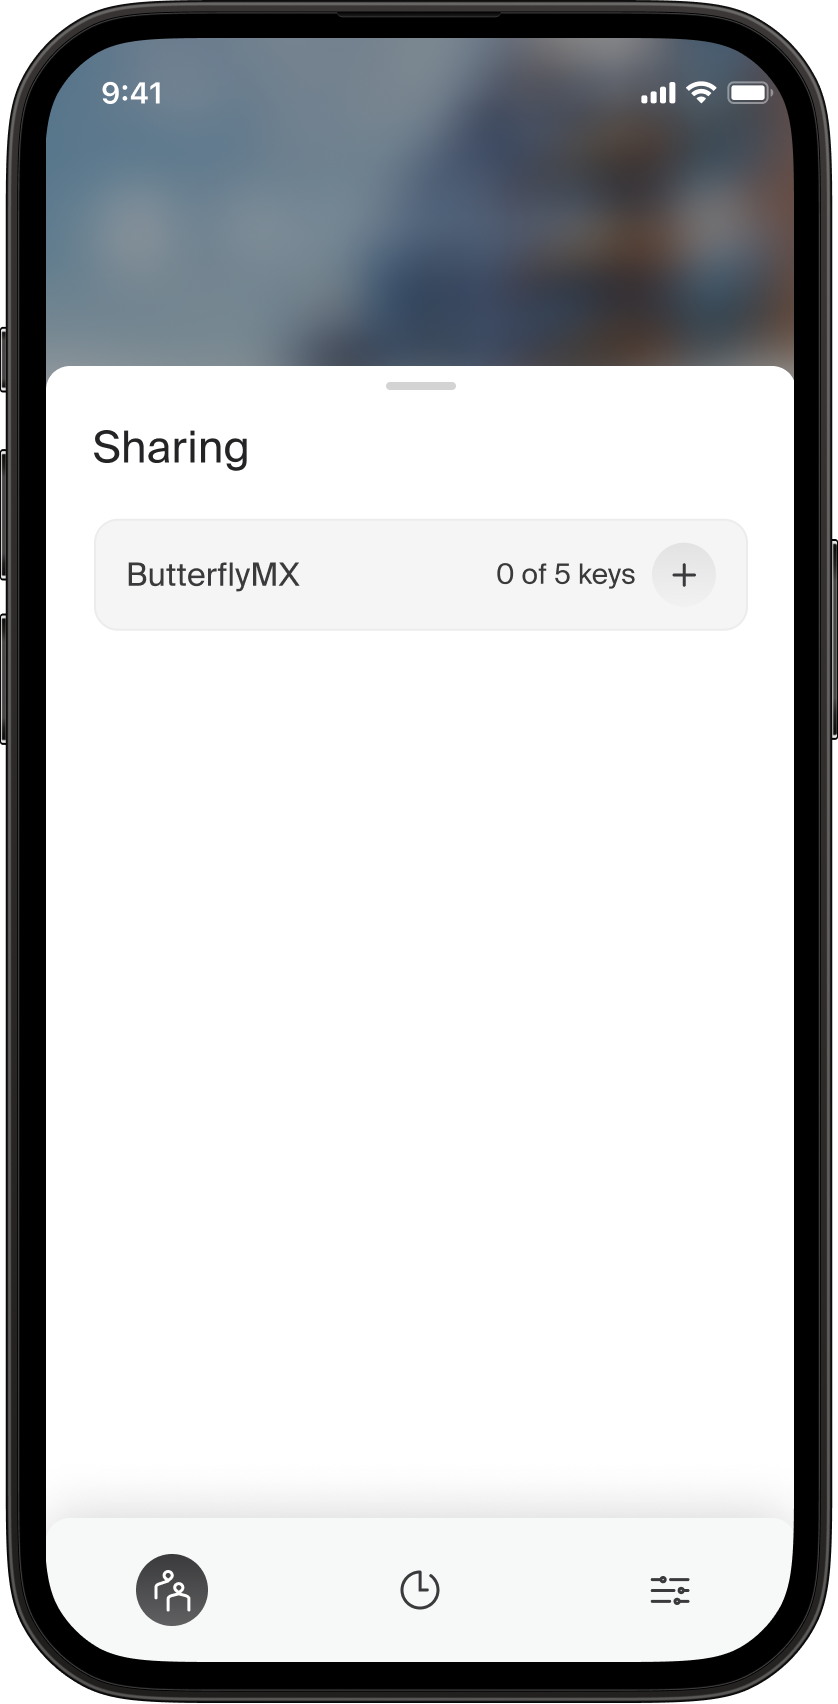
View your ButterflyMX visitor passes
ButterflyMX visitor passes are managed in the Ambient Home app under “Sharing”.
Tap the “Share” tab from the home page to open your “Sharing” panel. You can create up to five ButterflyMX visitor passes from the Ambient Home app.
From this list, you can add a new visitor pass, share or copy an existing visitor pass link, and delete an existing visitor pass.
Add a ButterflyMX visitor pass
- Tap the “+” button at the top of the ButterflyMX “Sharing” section
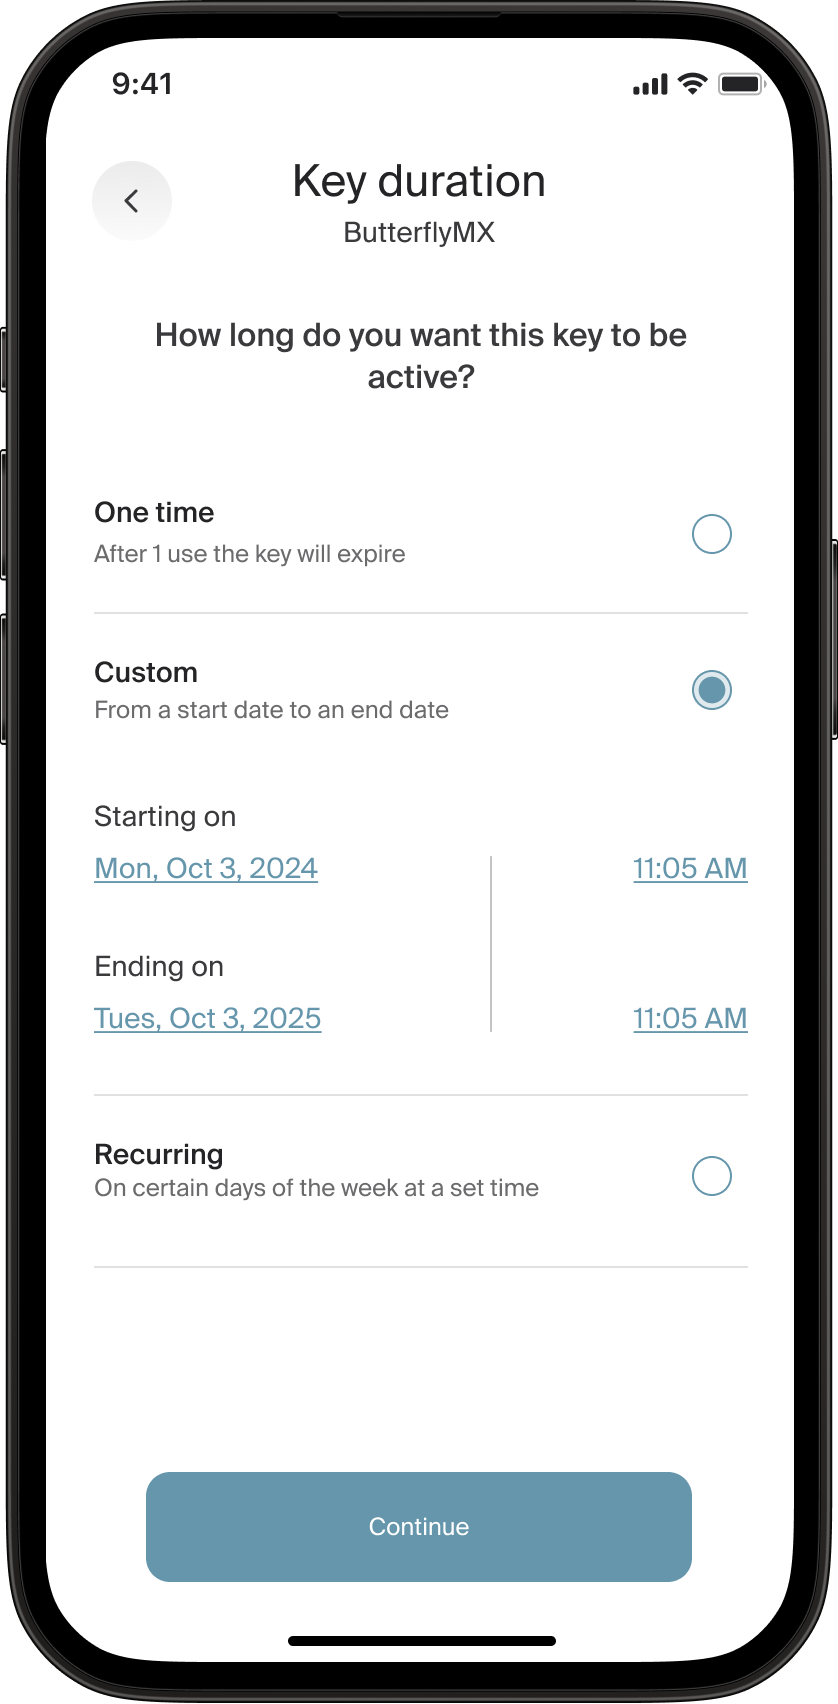
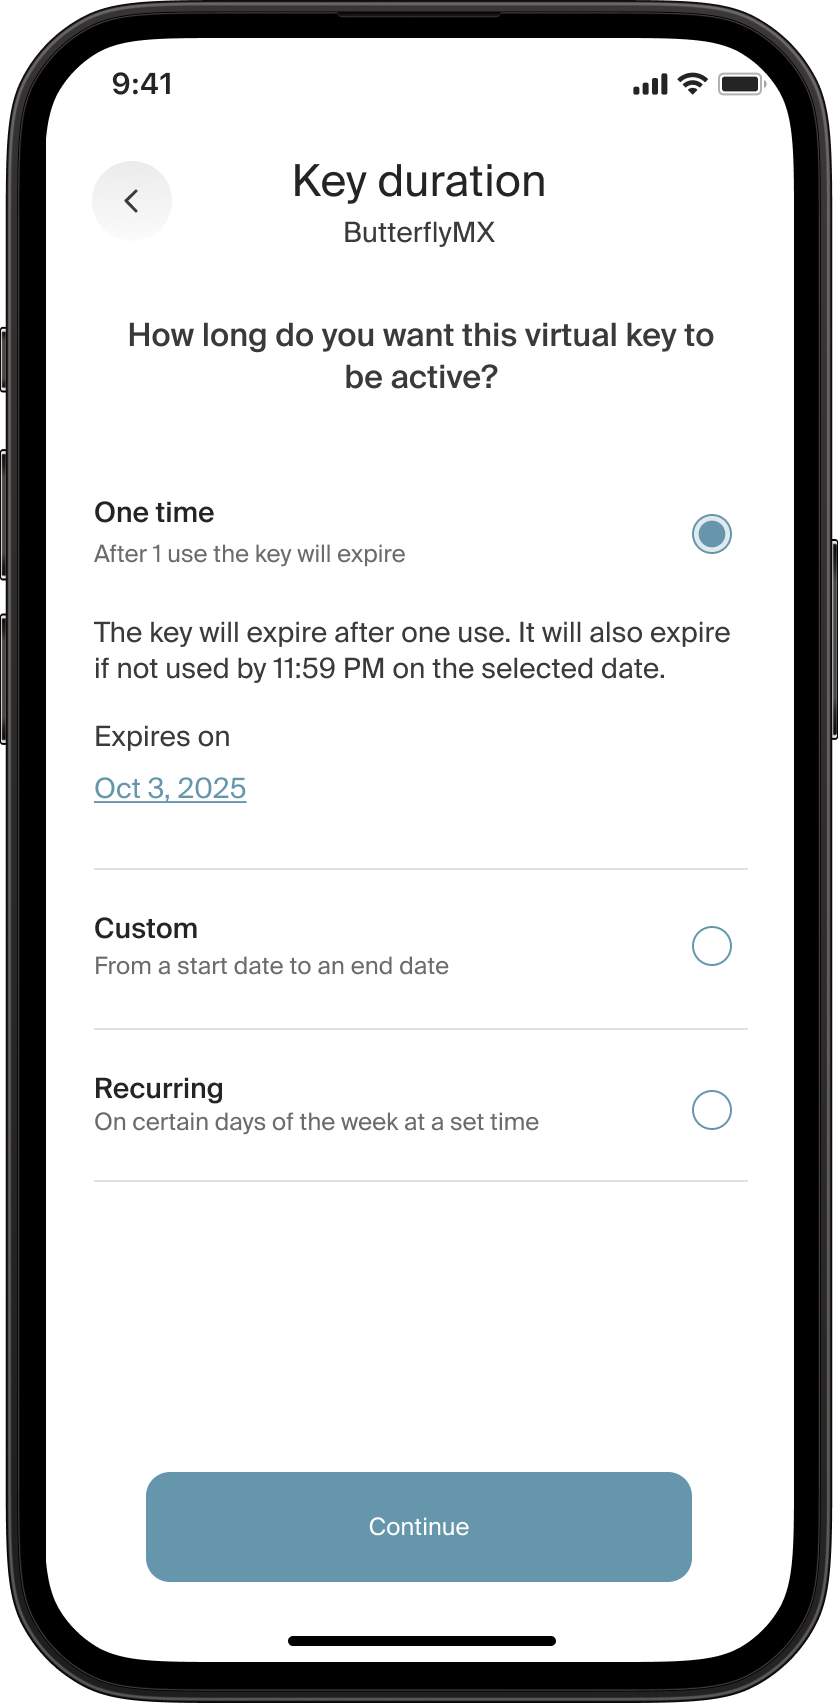
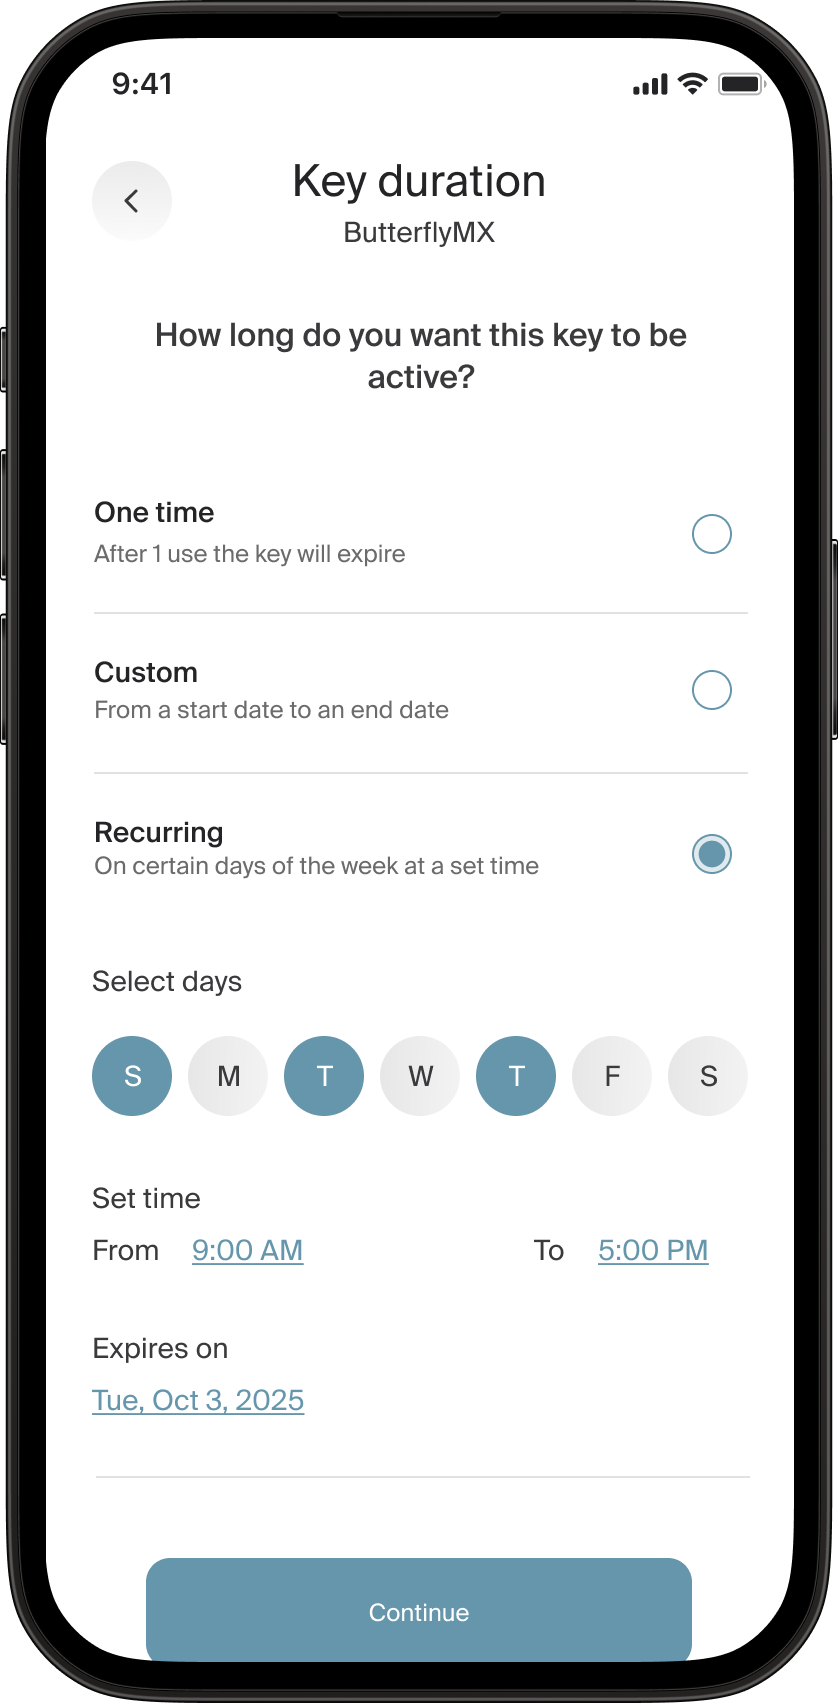
- From the “Key duration” panel, create a one-time, custom, or recurring visitor pass
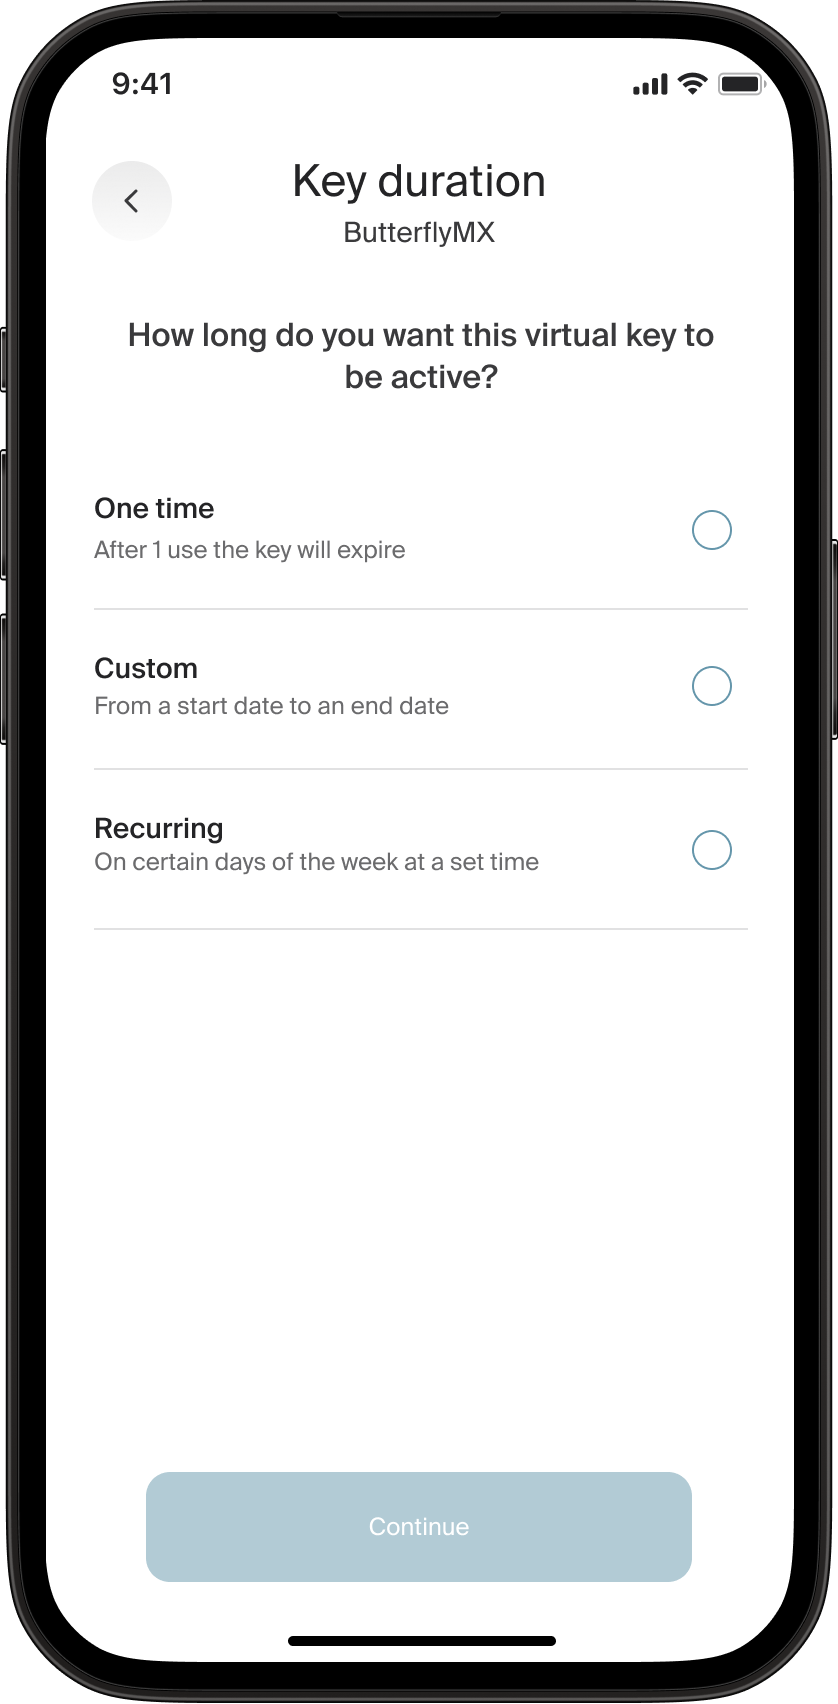
Custom passes
A custom visitor pass allows you to set a start and end date and time during which the pass will be valid.
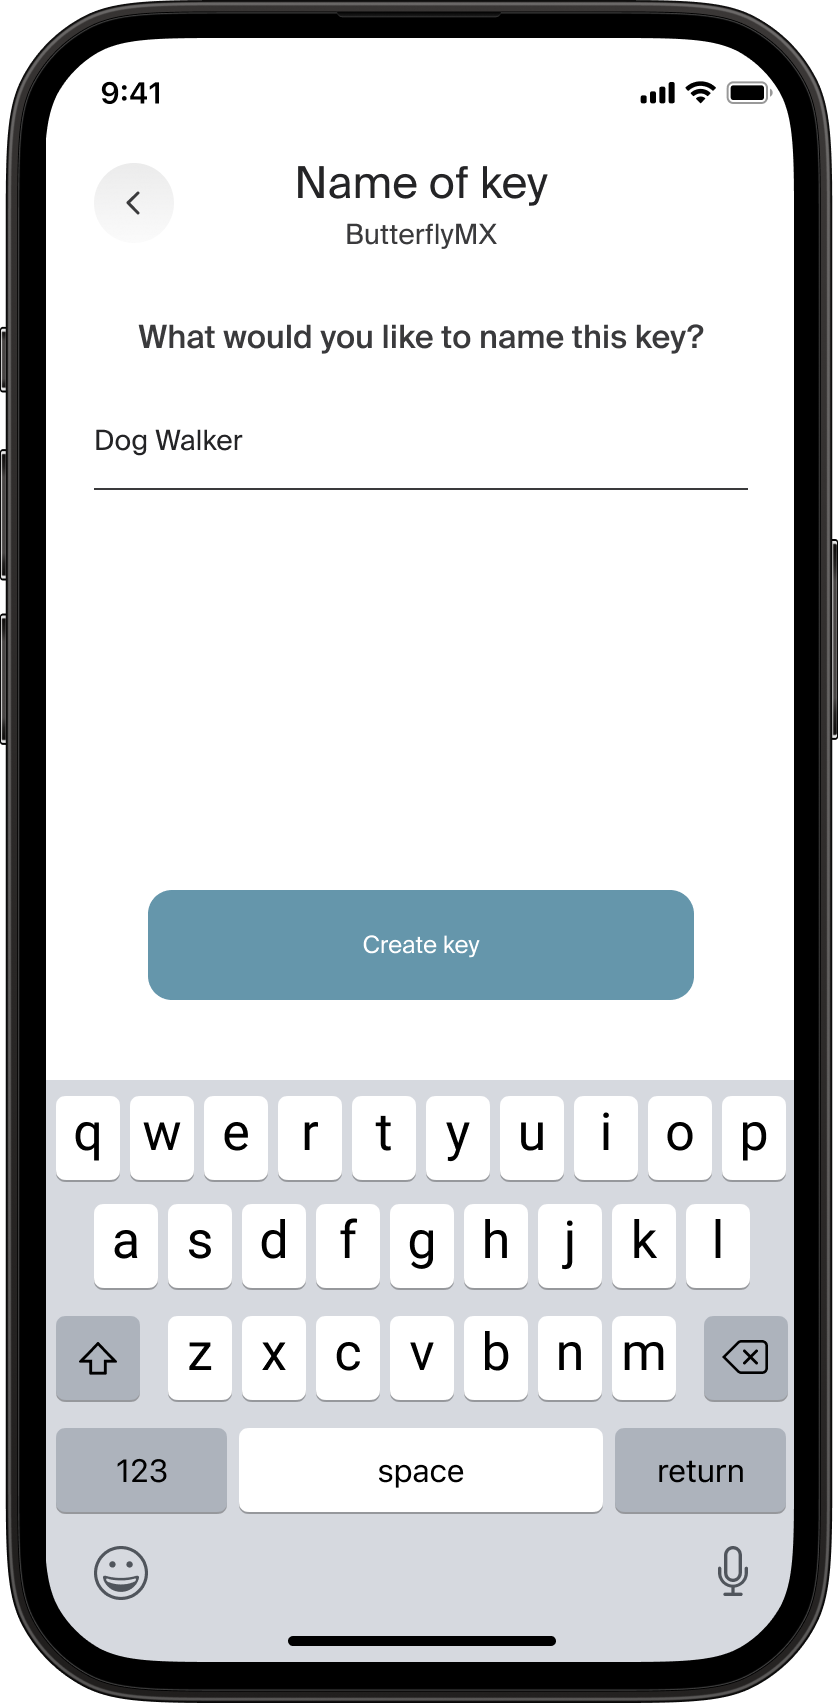
After creating the pass details, name the pass and tap “Create key”. You can now copy and share this pass with others.
One-time passes
A one-time visitor pass is valid until a set expiration date, or until it is used.
After creating the pass details, name the pass and tap “Create key”. You can now copy and share this pass with others.
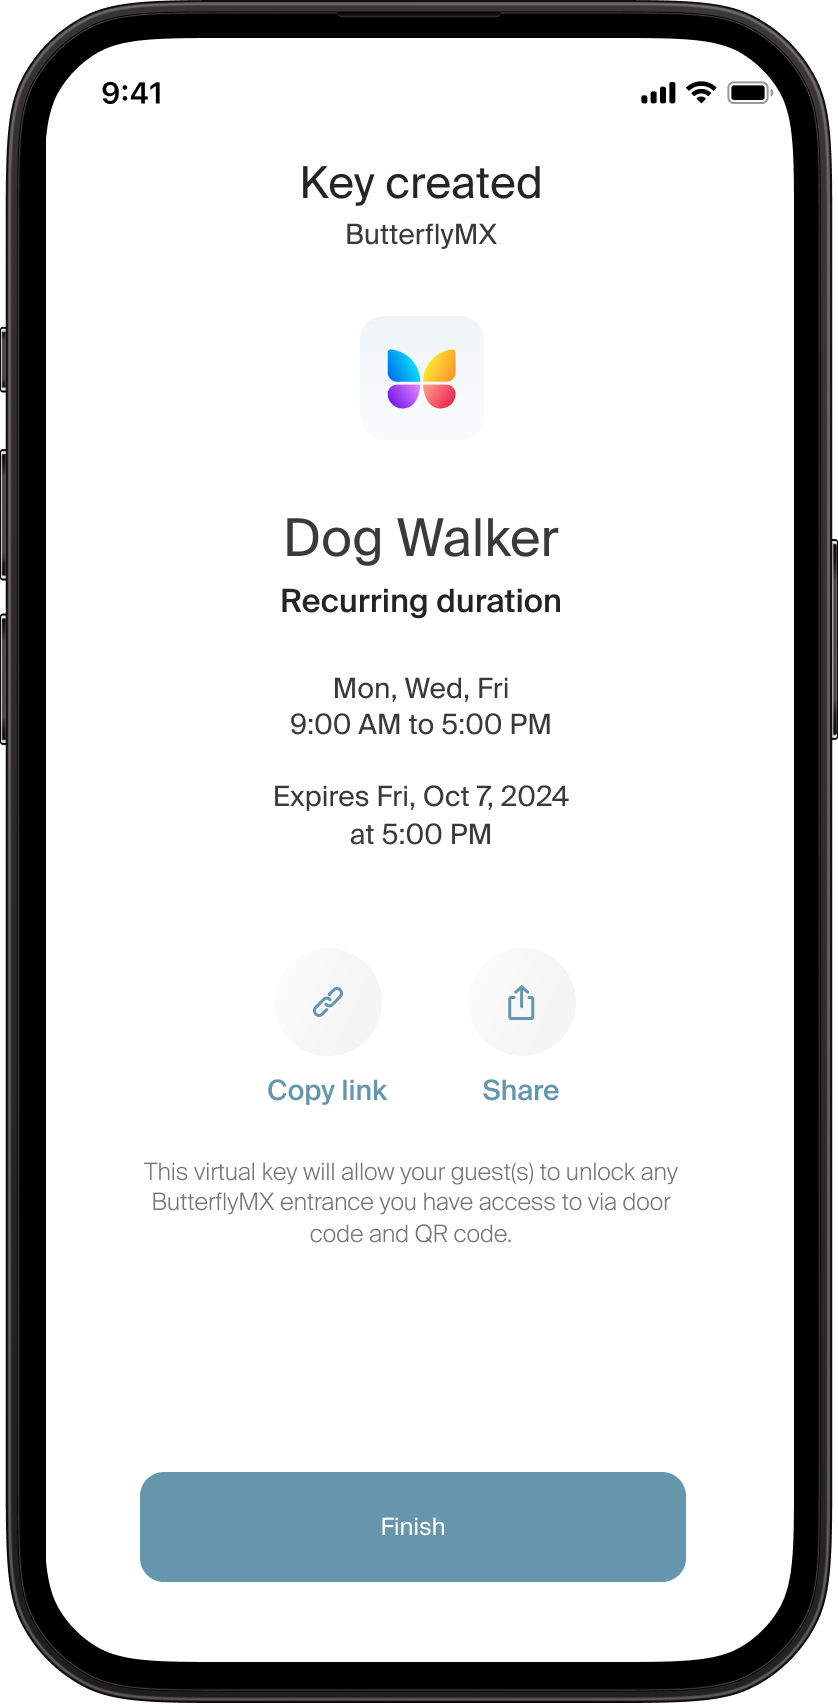
Recurring passes
A recurring visitor pass allows you to set the days of the week where the pass remains valid, along with start and end times on those days.
After creating the pass details, name the pass and tap “Create key”. You can now copy and share this pass with others.
Delete a ButterflyMX visitor pass
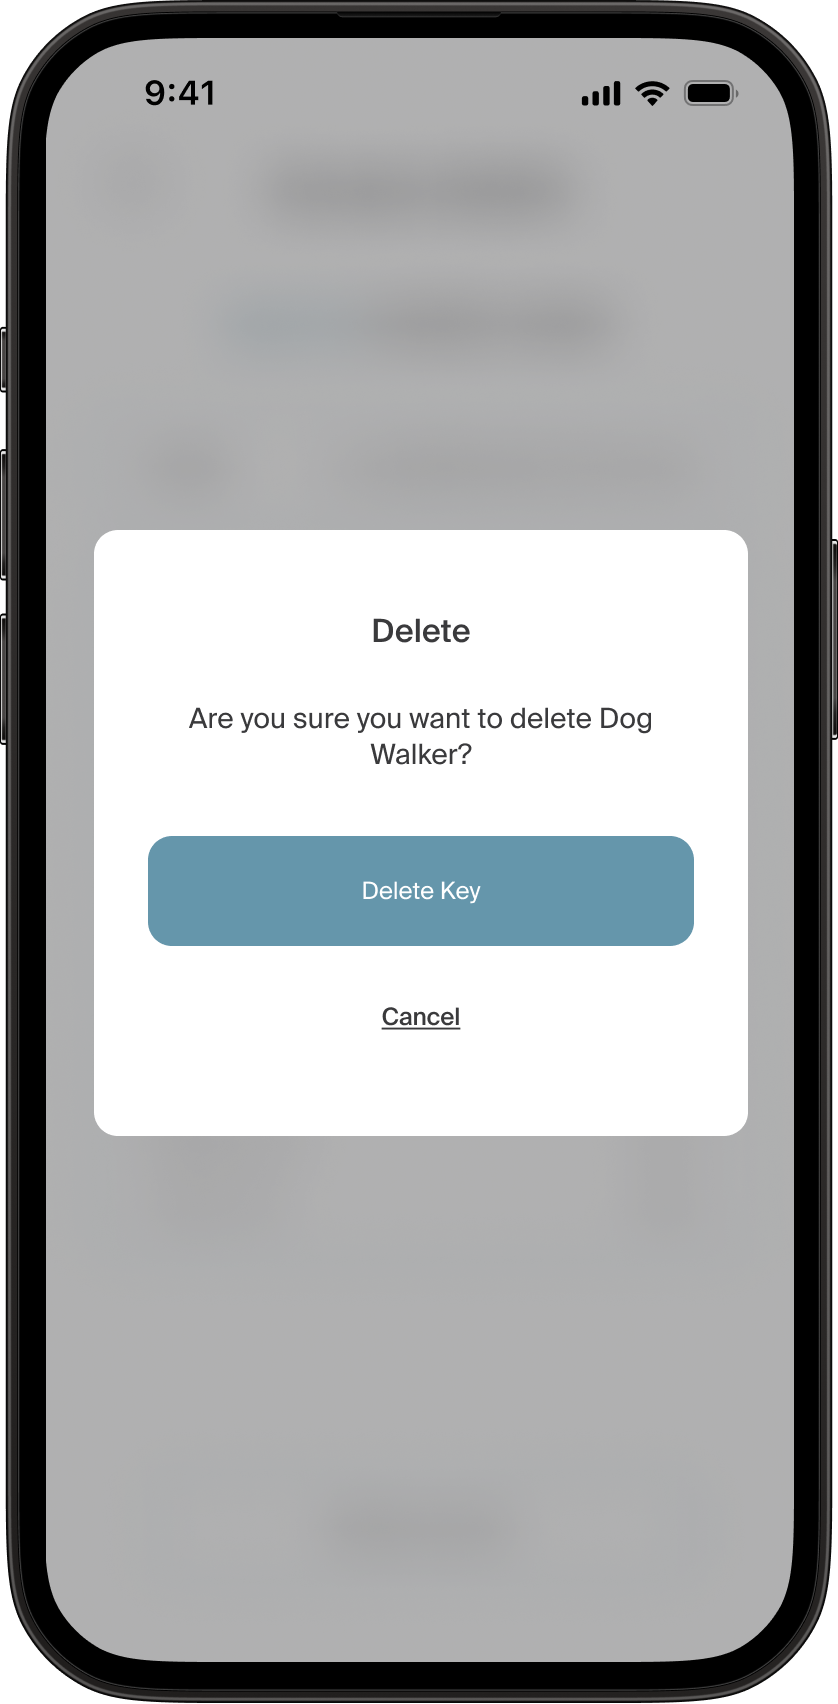
If you need to delete a visitor pass, tap the pass on the visitor pass list to open the pass detail screen.
Then, tap “Delete” and “Delete key”.